
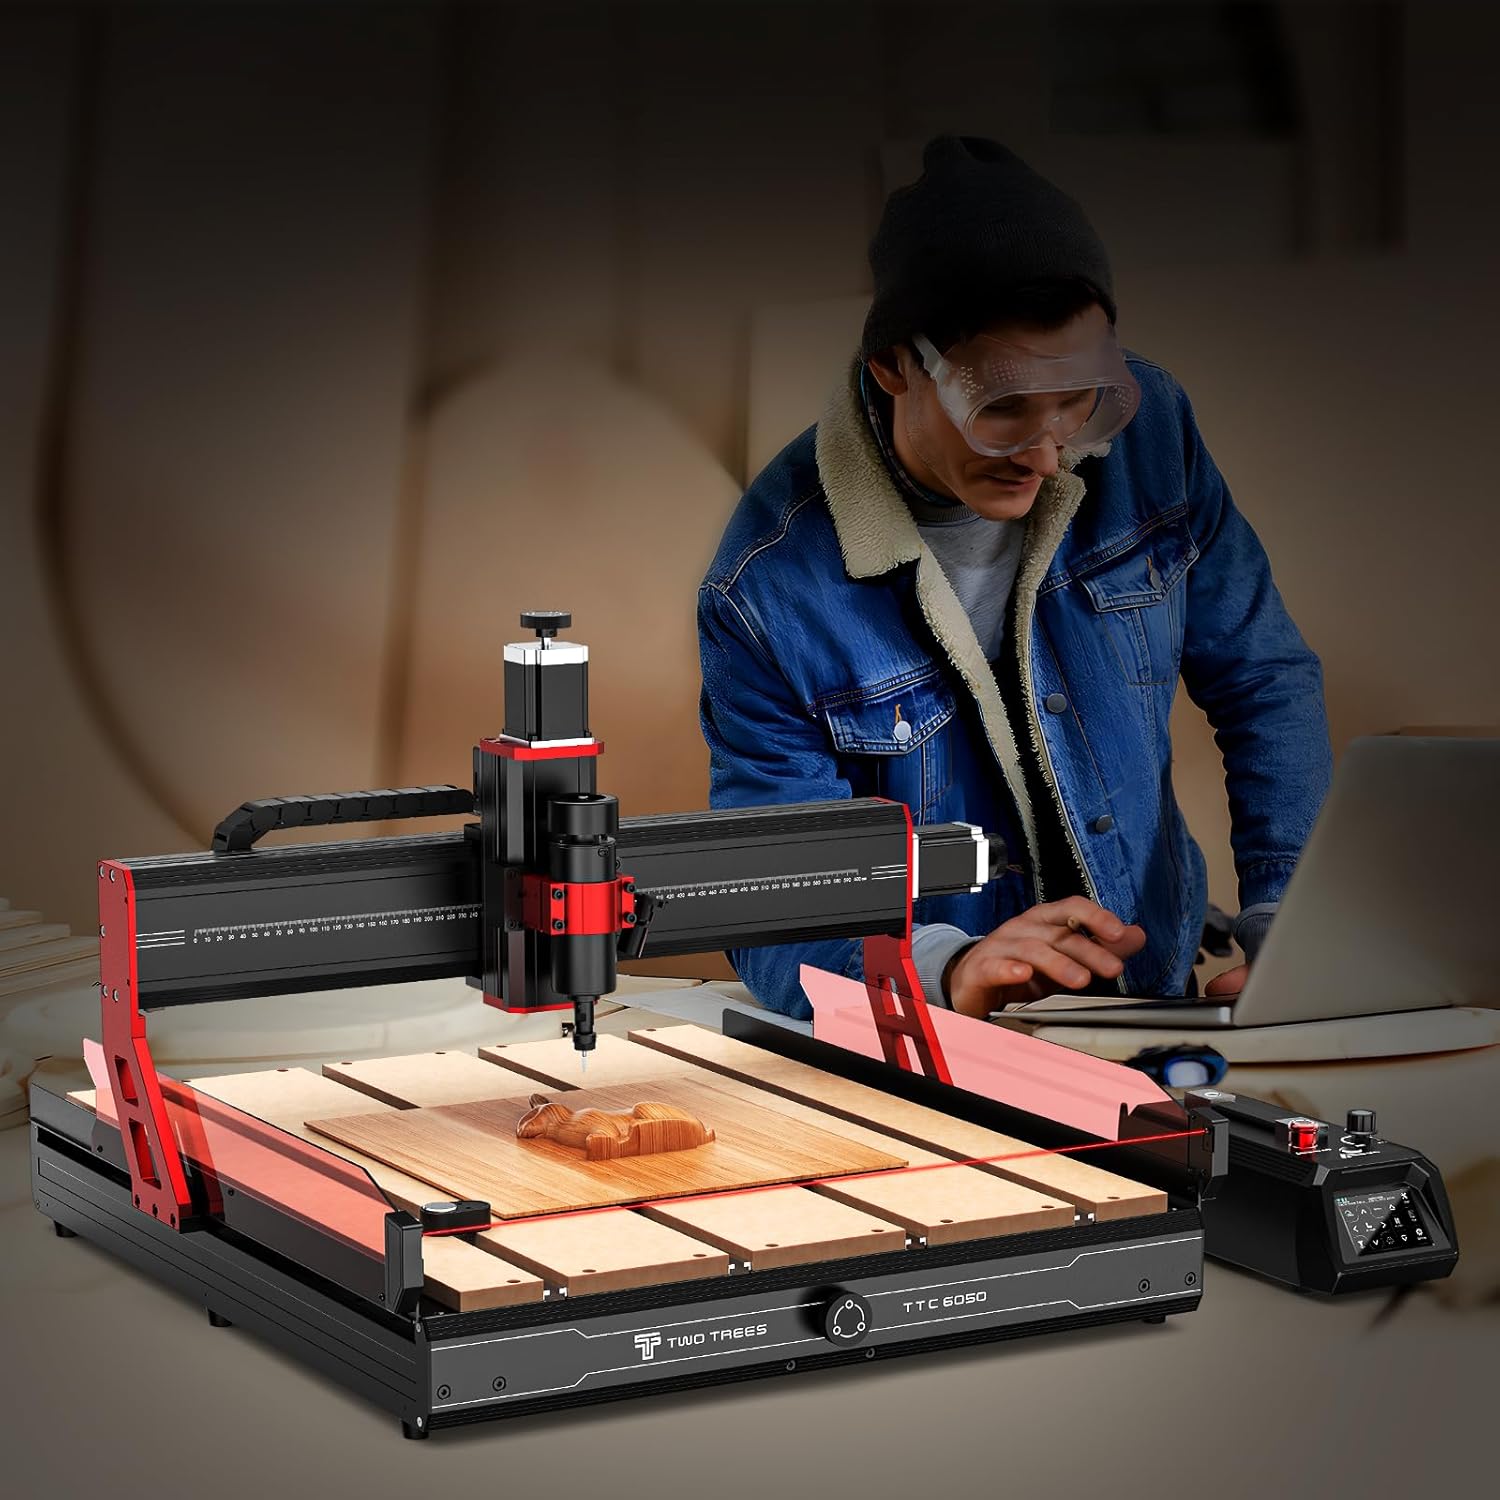
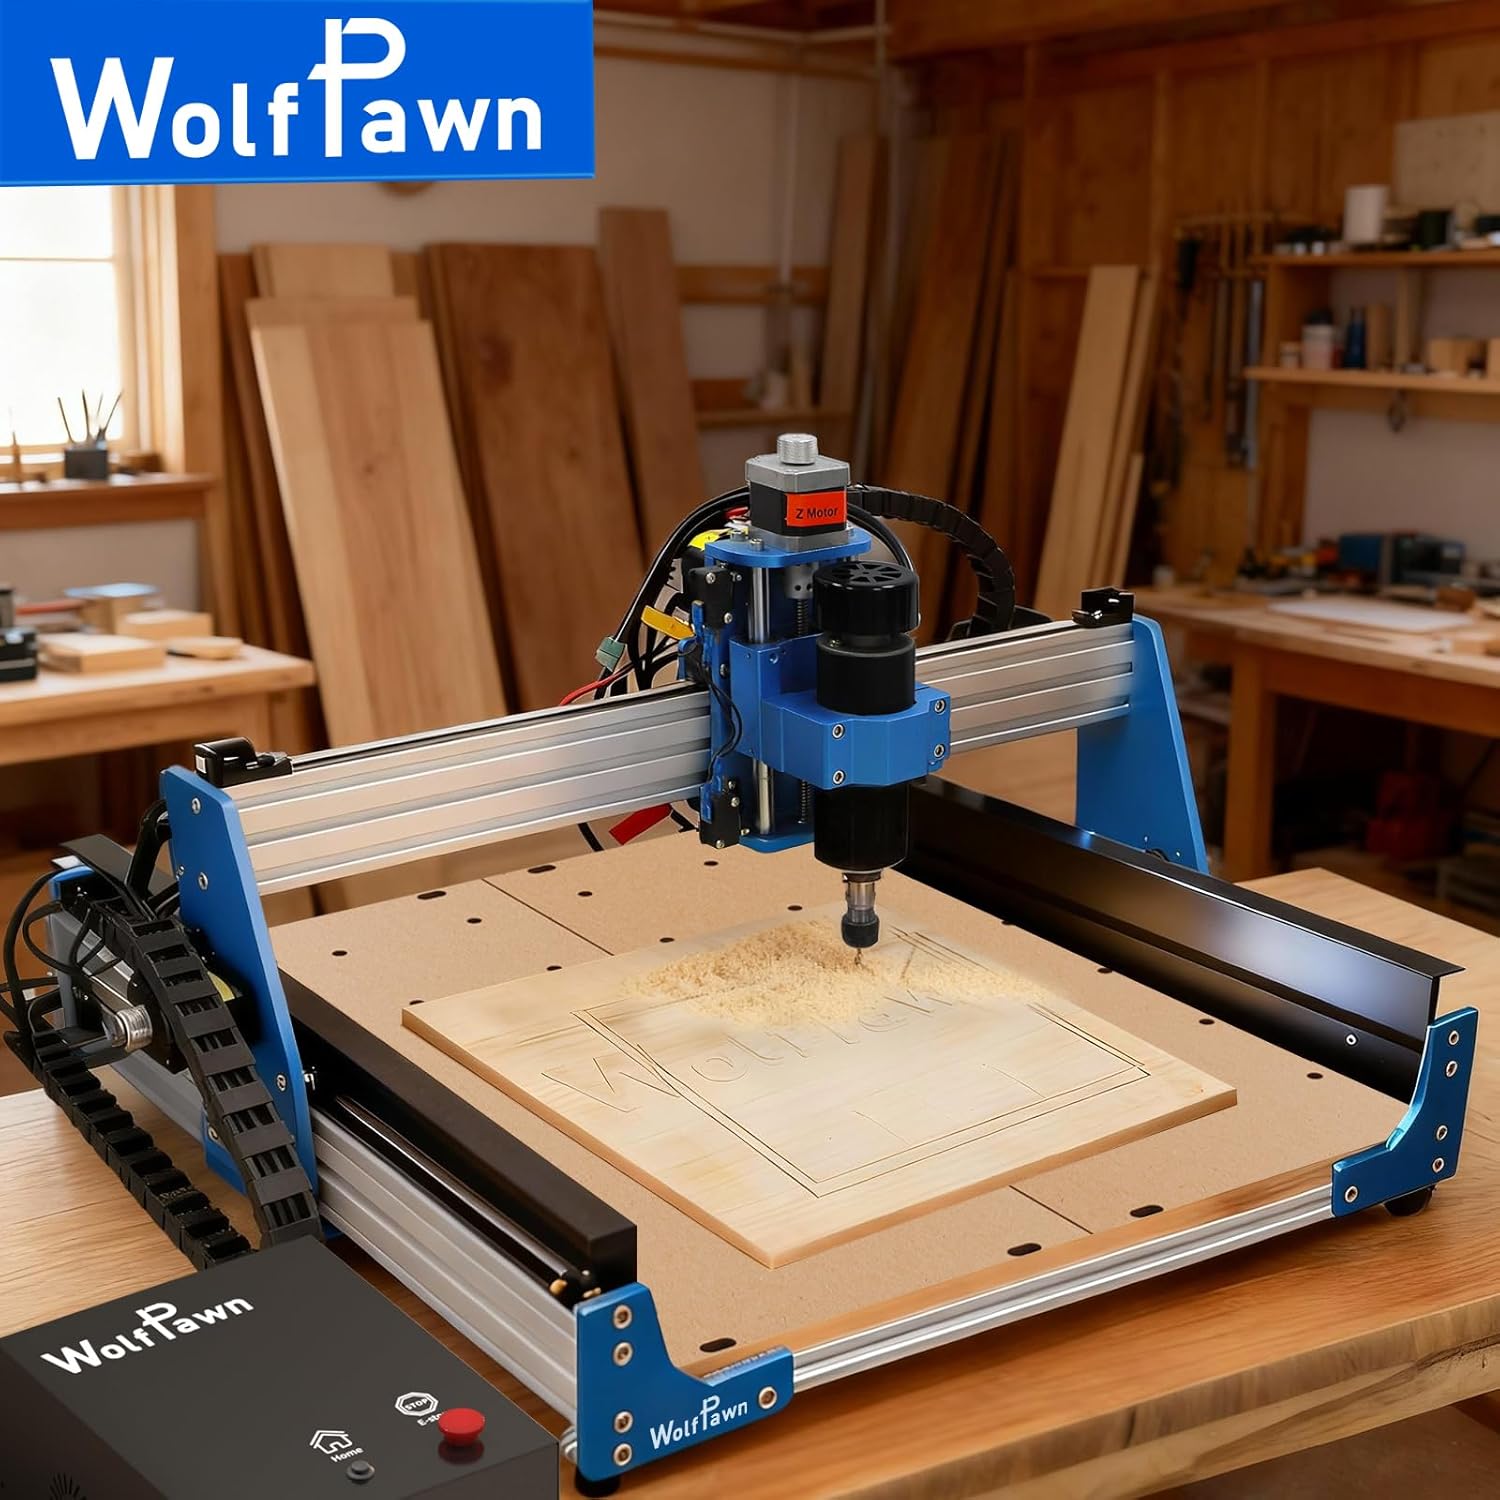
Product description
About Basic Machine Tests
After the machine is assembled, you can perform basic machine tests. The following is the recommended start up qequency for the system:
- 1. Confirm tha the USB cable of the control board is plugged into your cpmputer, and then start the computer.
- 2. Start the software and verify in the status window that no errors are displayed. Under normal circumstances, when the control board is connected to the software, it will display Idle. If a red error Alarrm appears, you need to click the Reset of the softwware with the mouse, and then unlock to reach the Idle state.
- 3. Make sure that the 24V power supply is connected to the control board first, and then the other end is connected to 110-220V. Press the on/ off button on the control panel.
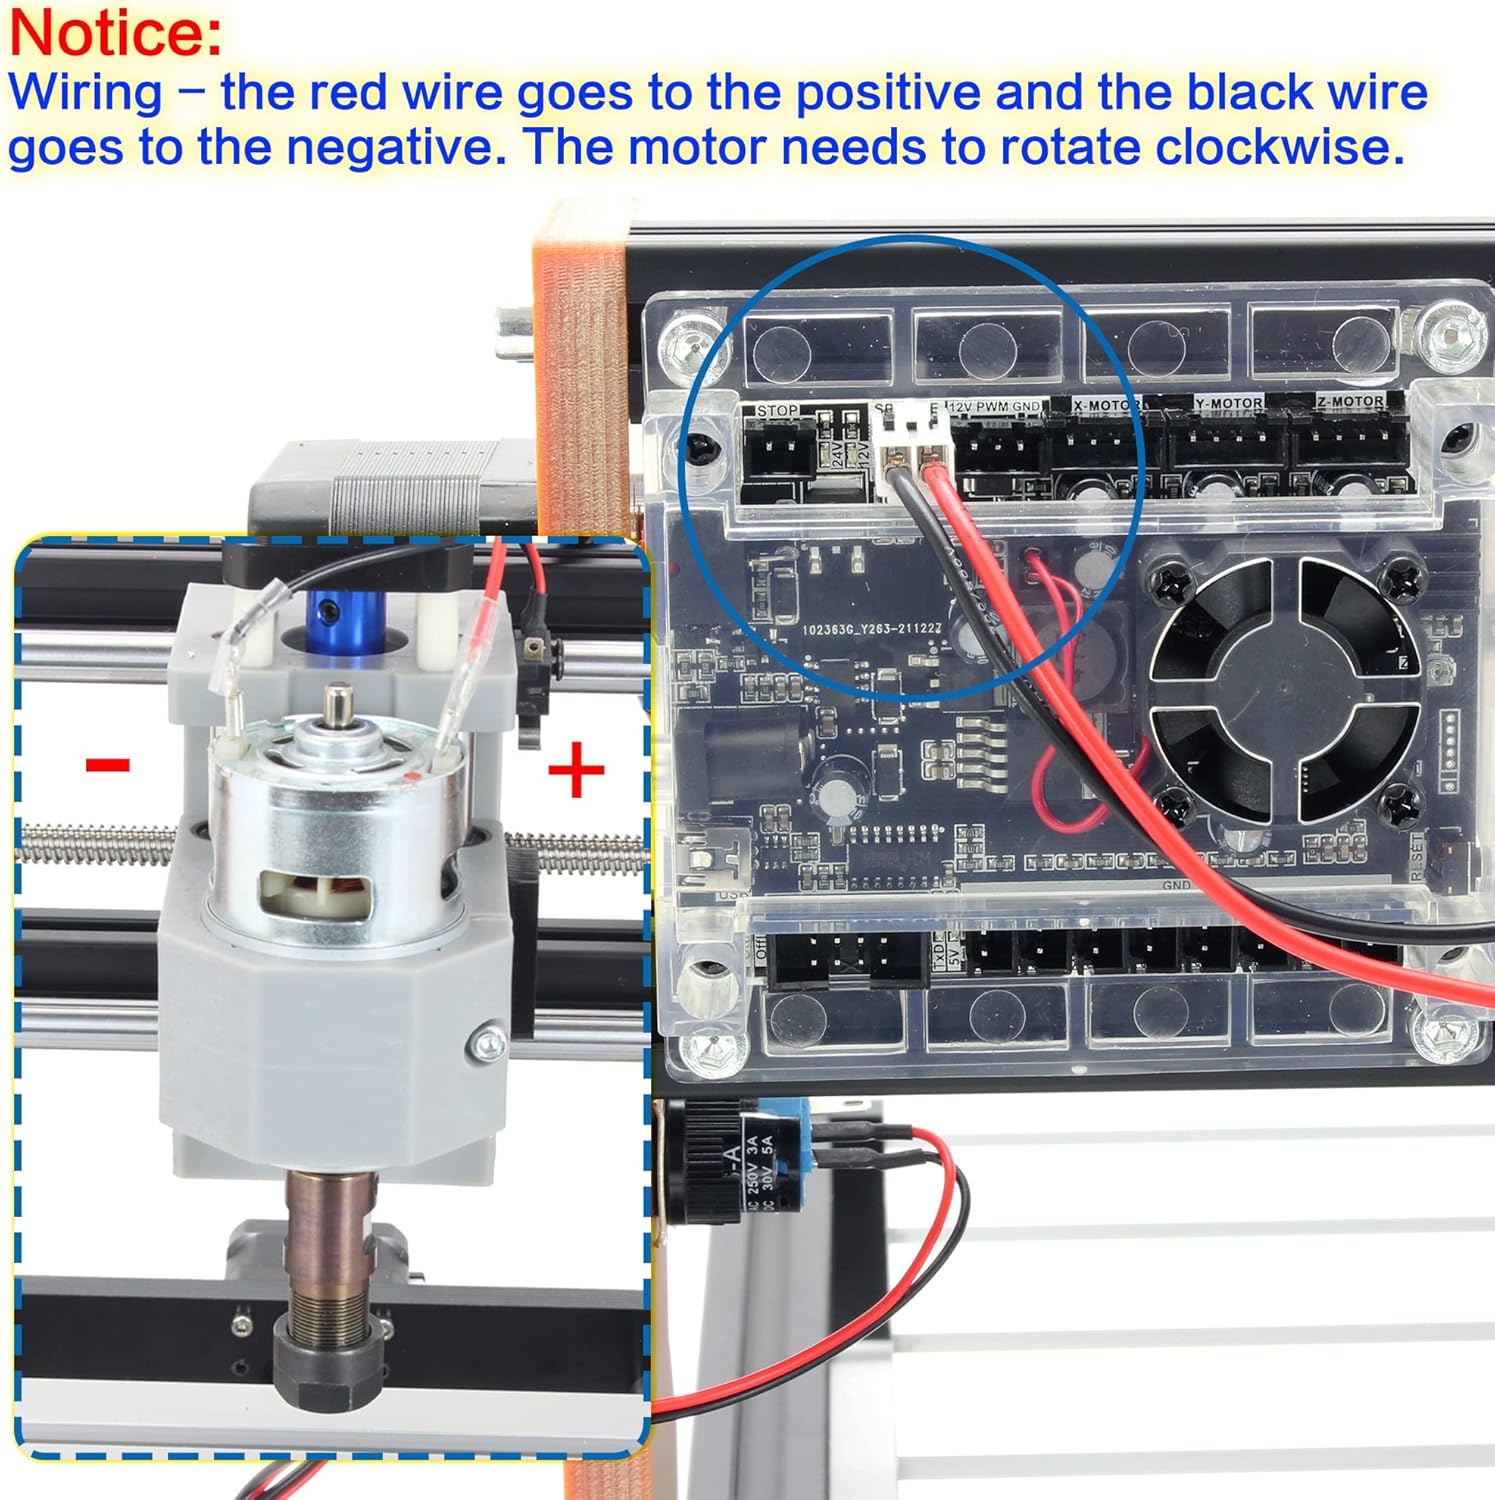
- 4. Next, click the Spindle button to turn on the spindle motor. Move the slider left anf right to verify whether the motor speed changes.
- 5. Adjust the value of Feed to the range of 200 to 500. Use the mouse to click the direction button on the left to confirm whether the x axis and y axis are moving. In a slimilar manner, click the up and down buttons on the far right to verify that the z axis moves normally. If thre is no problem with all these tests, it means that your engraving machine can work normally. Shut down the machine using the reverse start process.
- 6. Close the control panel.
- 7. Unplug the 24v DC power from the power supply.
- 8. Close the software program and turn off the computer. Remember, if you run the machine offline, the use cable must be disconnected for the control board.

Other Parts List-1
- 1 × Power Supply 24V
- 1 × GRBL1.1 Control Board + USB Wire
- 1 × U Disk ( 2G ) + English Maunal
- 10 × Engraving Bit Kit ( 3.175mm/20°/0.1mm )
- 4 × Clamp + 1 × Brush + 1 × Rolled Strips
Other Parts List-2
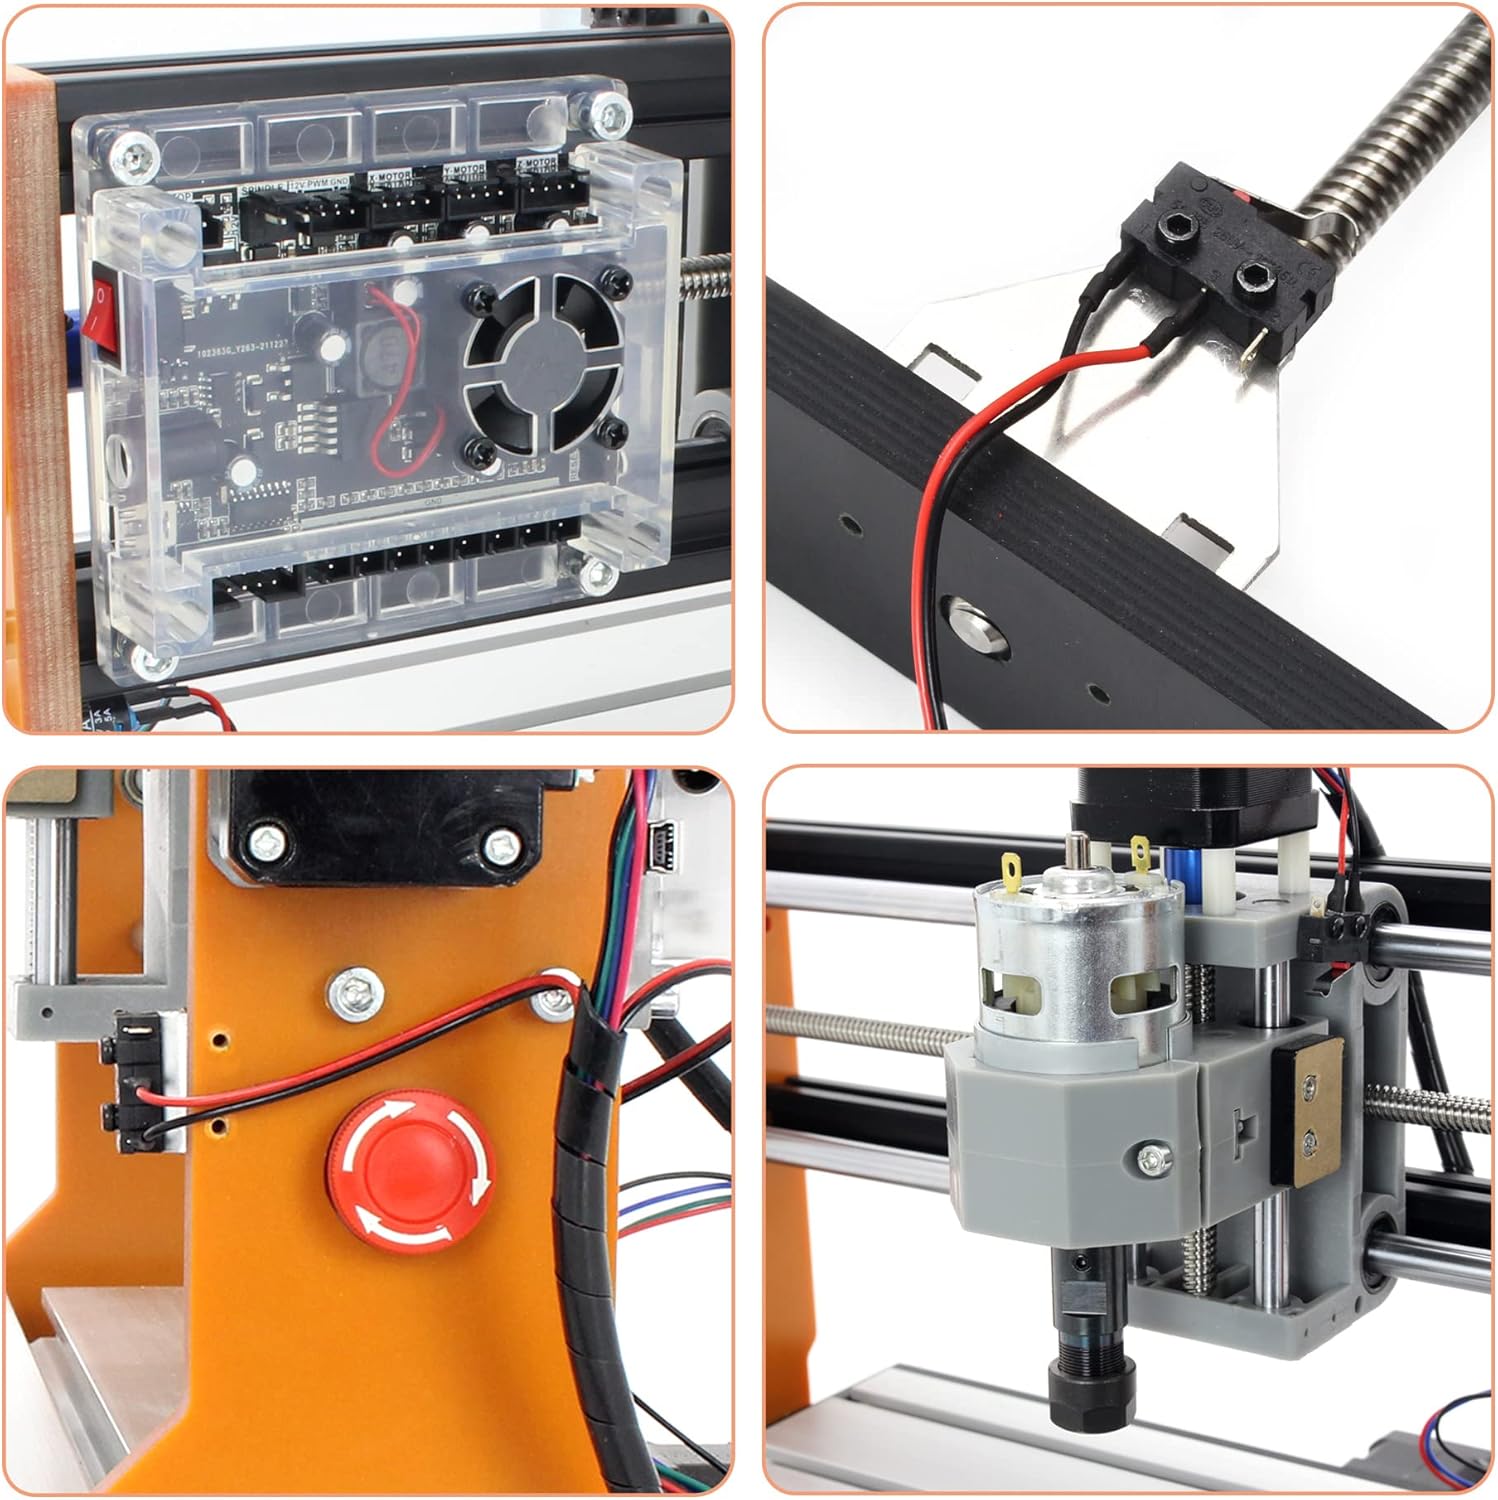
- 1× Energency Stop ( 80mm )
- 3 × limit Switch
- 1 × X axis Limit Fixing Plate
- 1 × Y axis Limit Fixing Plate
- 1 × Z axis Limit Acrylic
- 1 × Spindle Motor Wire + 1 × Stepper Motor Wire + Winding Tube
- 2 × ER Wrench + 1 × Allen Wrench Set
Upgrade CNC MAchine PACKAGE
Mechanical Parts List
- 1 × 15×180×300mm Working Desk
- 2 × 20×40×290mm Aluminum Pro
- 2 × 20×20×360mm Aluminum Profile
- 4 × Guide Rail ( 2pcs Z axis-φ10×360mm; 2pcs Y axis-φ10×360mm)
- 2 × Lead Screw ( X Axis-365mm , Y Axis-295mm)
- 4 × BakeliteResinPlate ( A+B+C+D )
- 3 × Stepper Motor ( 42×34mm )
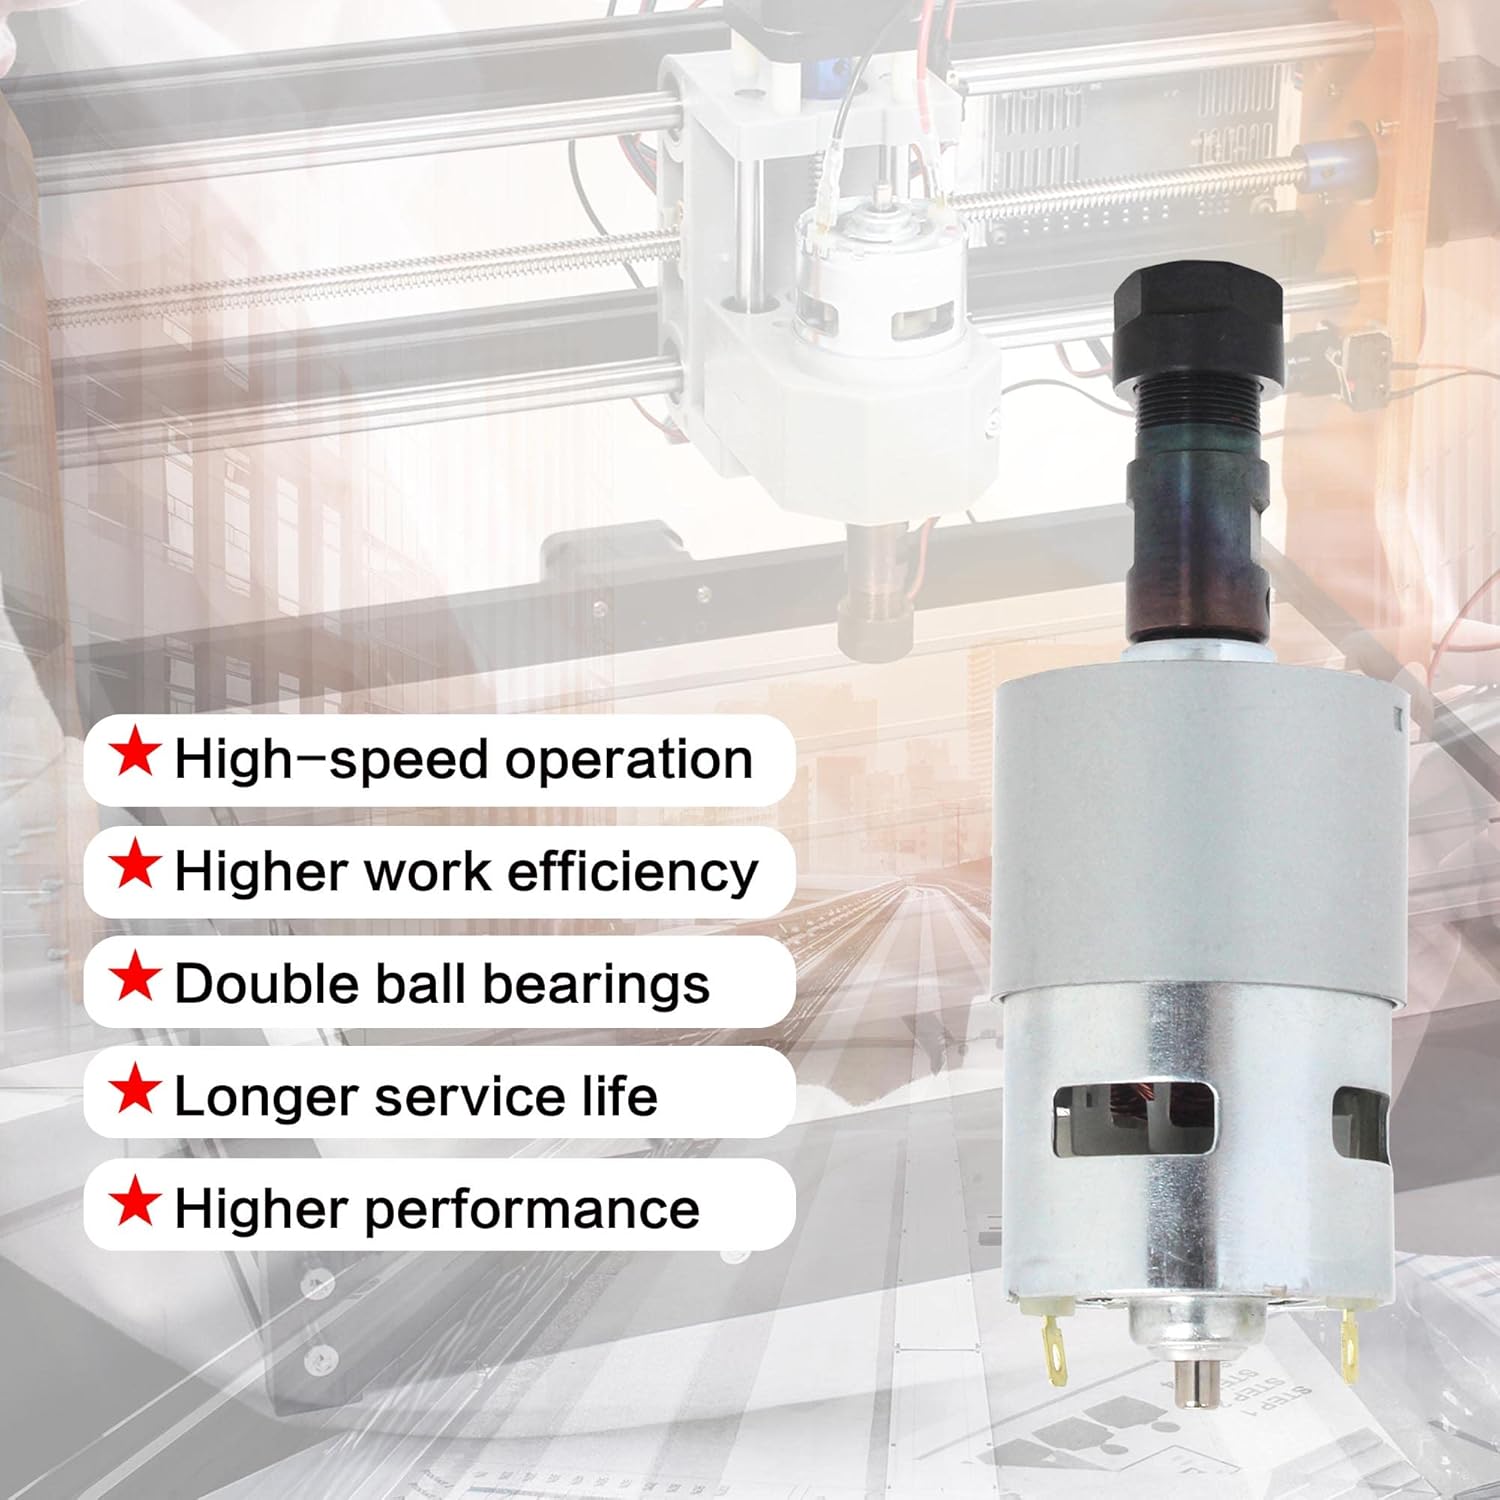
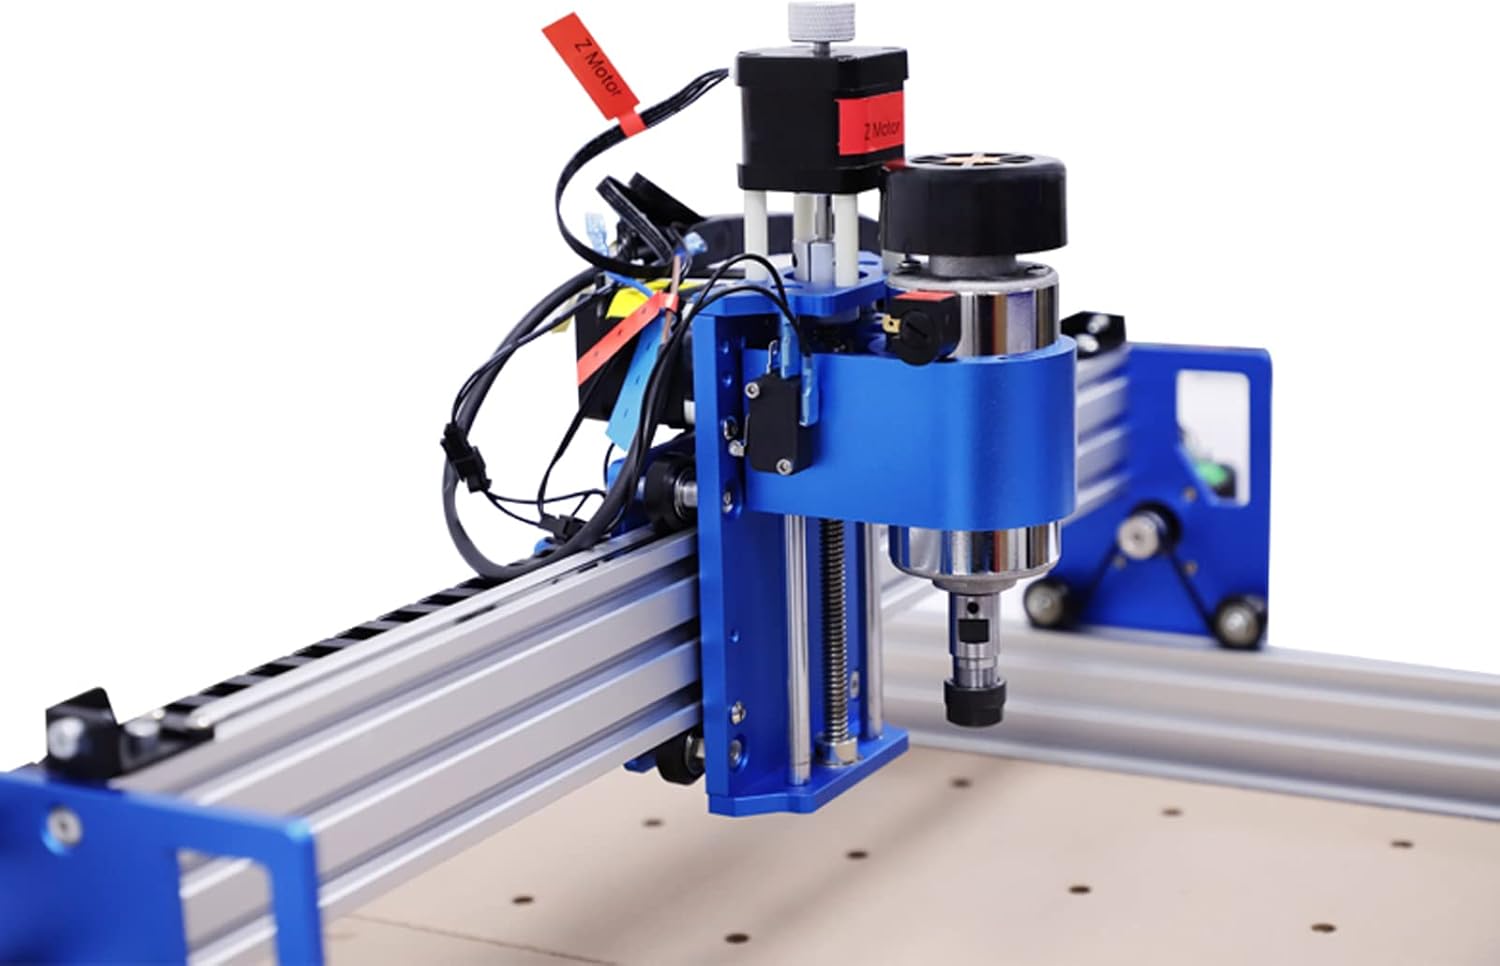
- 1 × X-Z Axis Assembly + 775 Spindle Motor (100W)
- 4 × Slider
- 1 × Nut Seat
Screw Parts List
- 43pcs M5×16 Bolt
- 43pcs M5×10 Bolt
- 8pcs M3×14 Bolt
- 6pcs M2.5×10 Bolt
- 6pcs M3×6 Bolt
- 2pcs Copper Nut
- 16pcs M5 T-Nut
- 10pcs Slider Nut
- 2pcs× Spring ( 0.8×12×30mm )
- 2pcs Coupling (5×8mm )

New Fuction of Updated CNC Router Machine
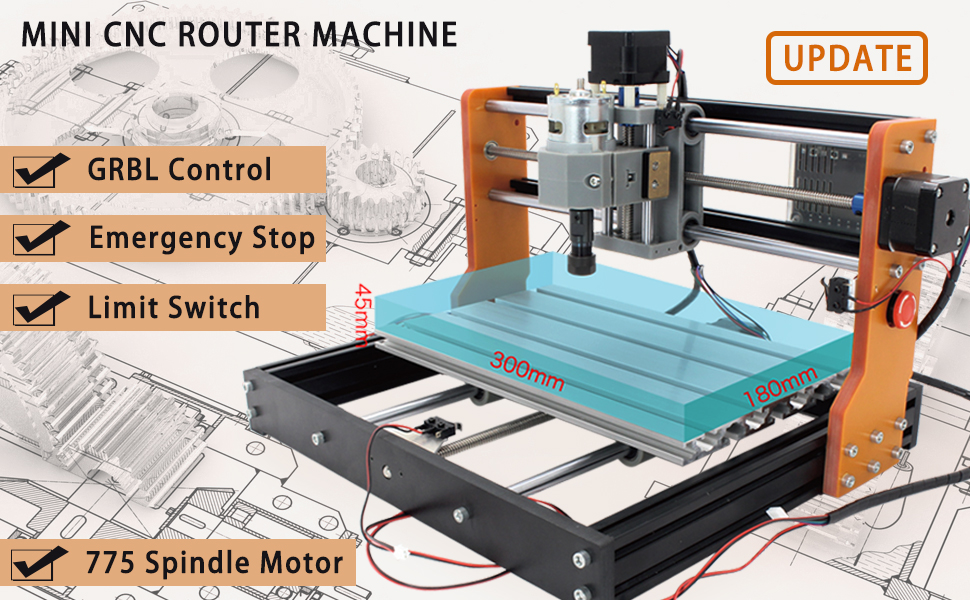
- Add the X/Y/Z axis limit switch fuction, which means that the engraving machine can automatiocally stop moving when the X/Y/Z axis moves beyond the engraving machine stroke. This feature may extend the life of the engraving machine well.
- Increase the function of emergency stop button. When the engraving machine is working, if it needs to stop engraving immediately due to an unexpected situation, you can press this button. The emergency stop switch button can well meet the user's engraving needs.

Basic Information
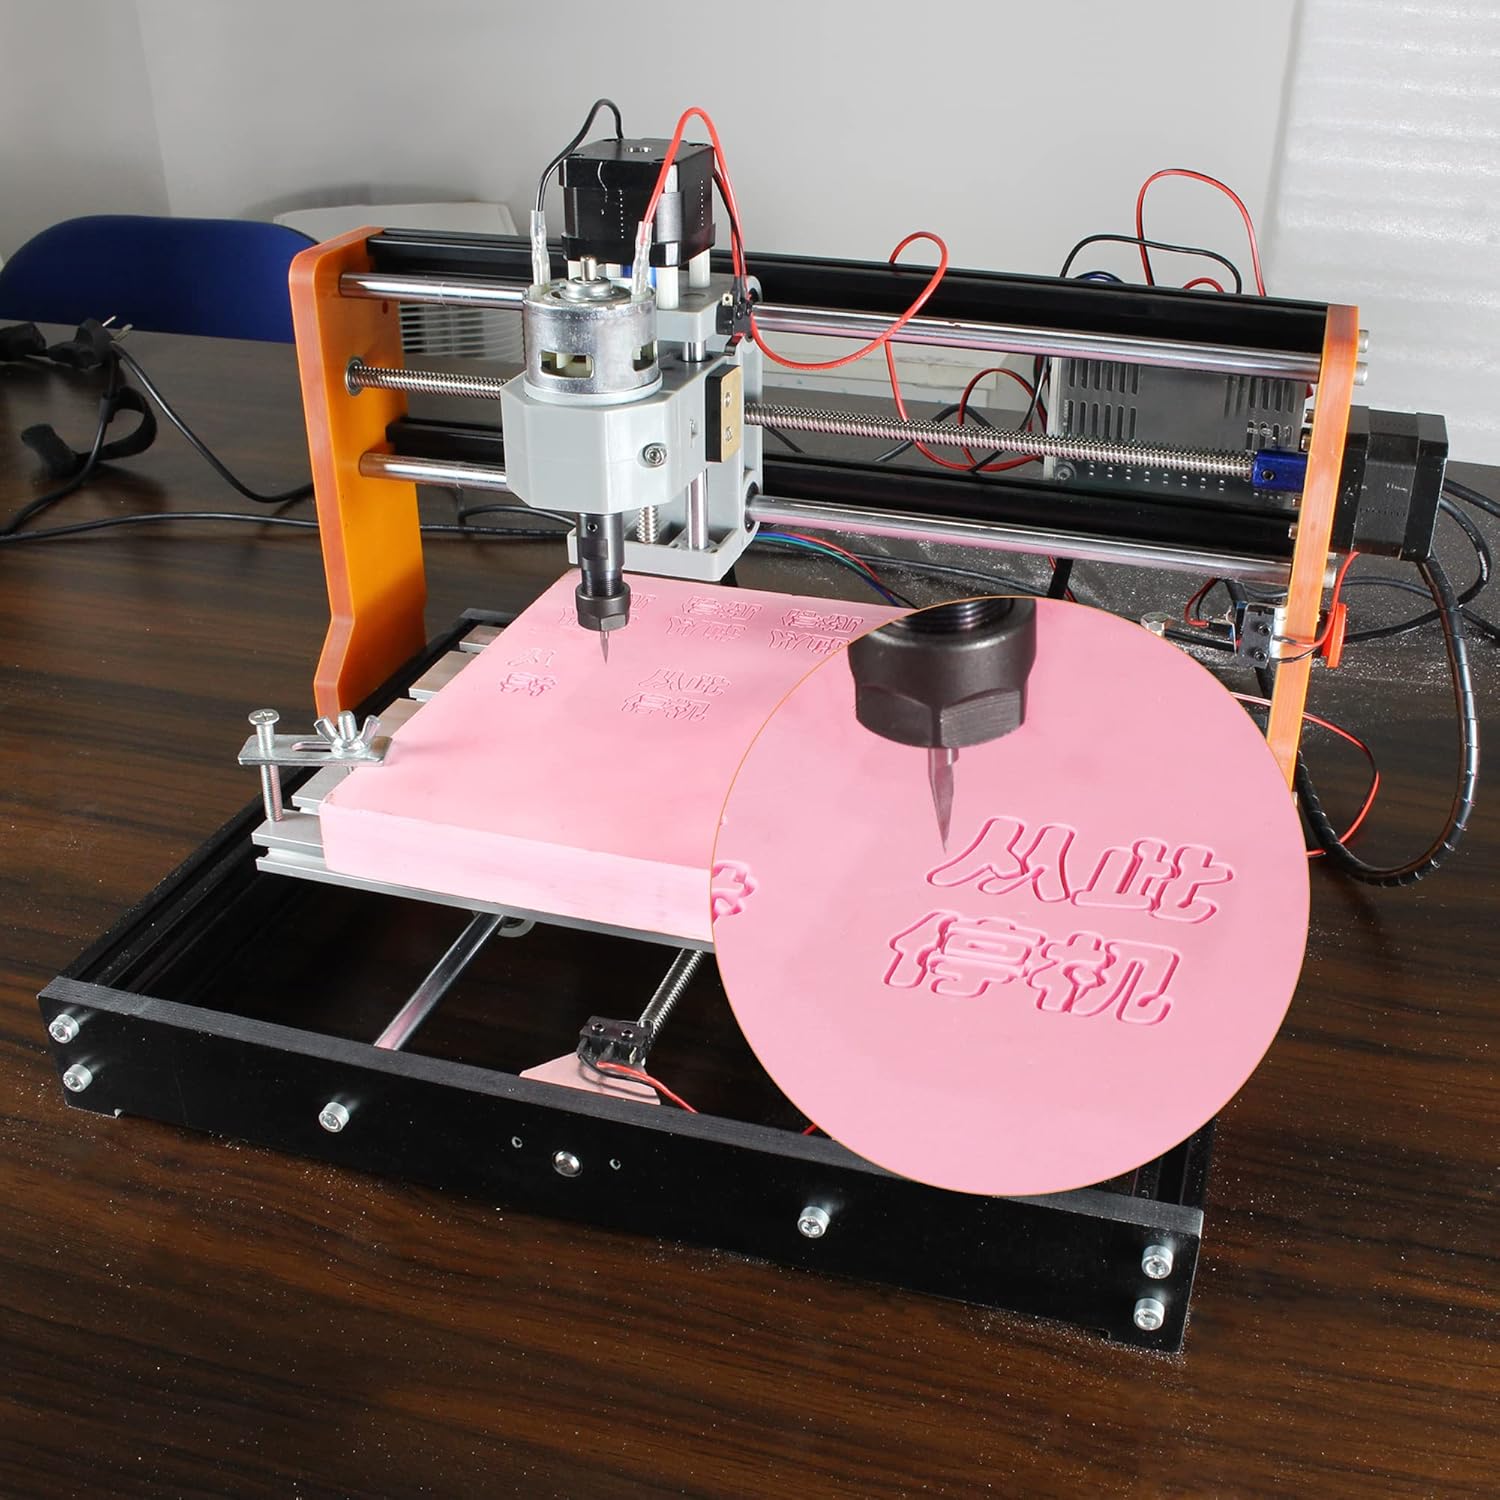
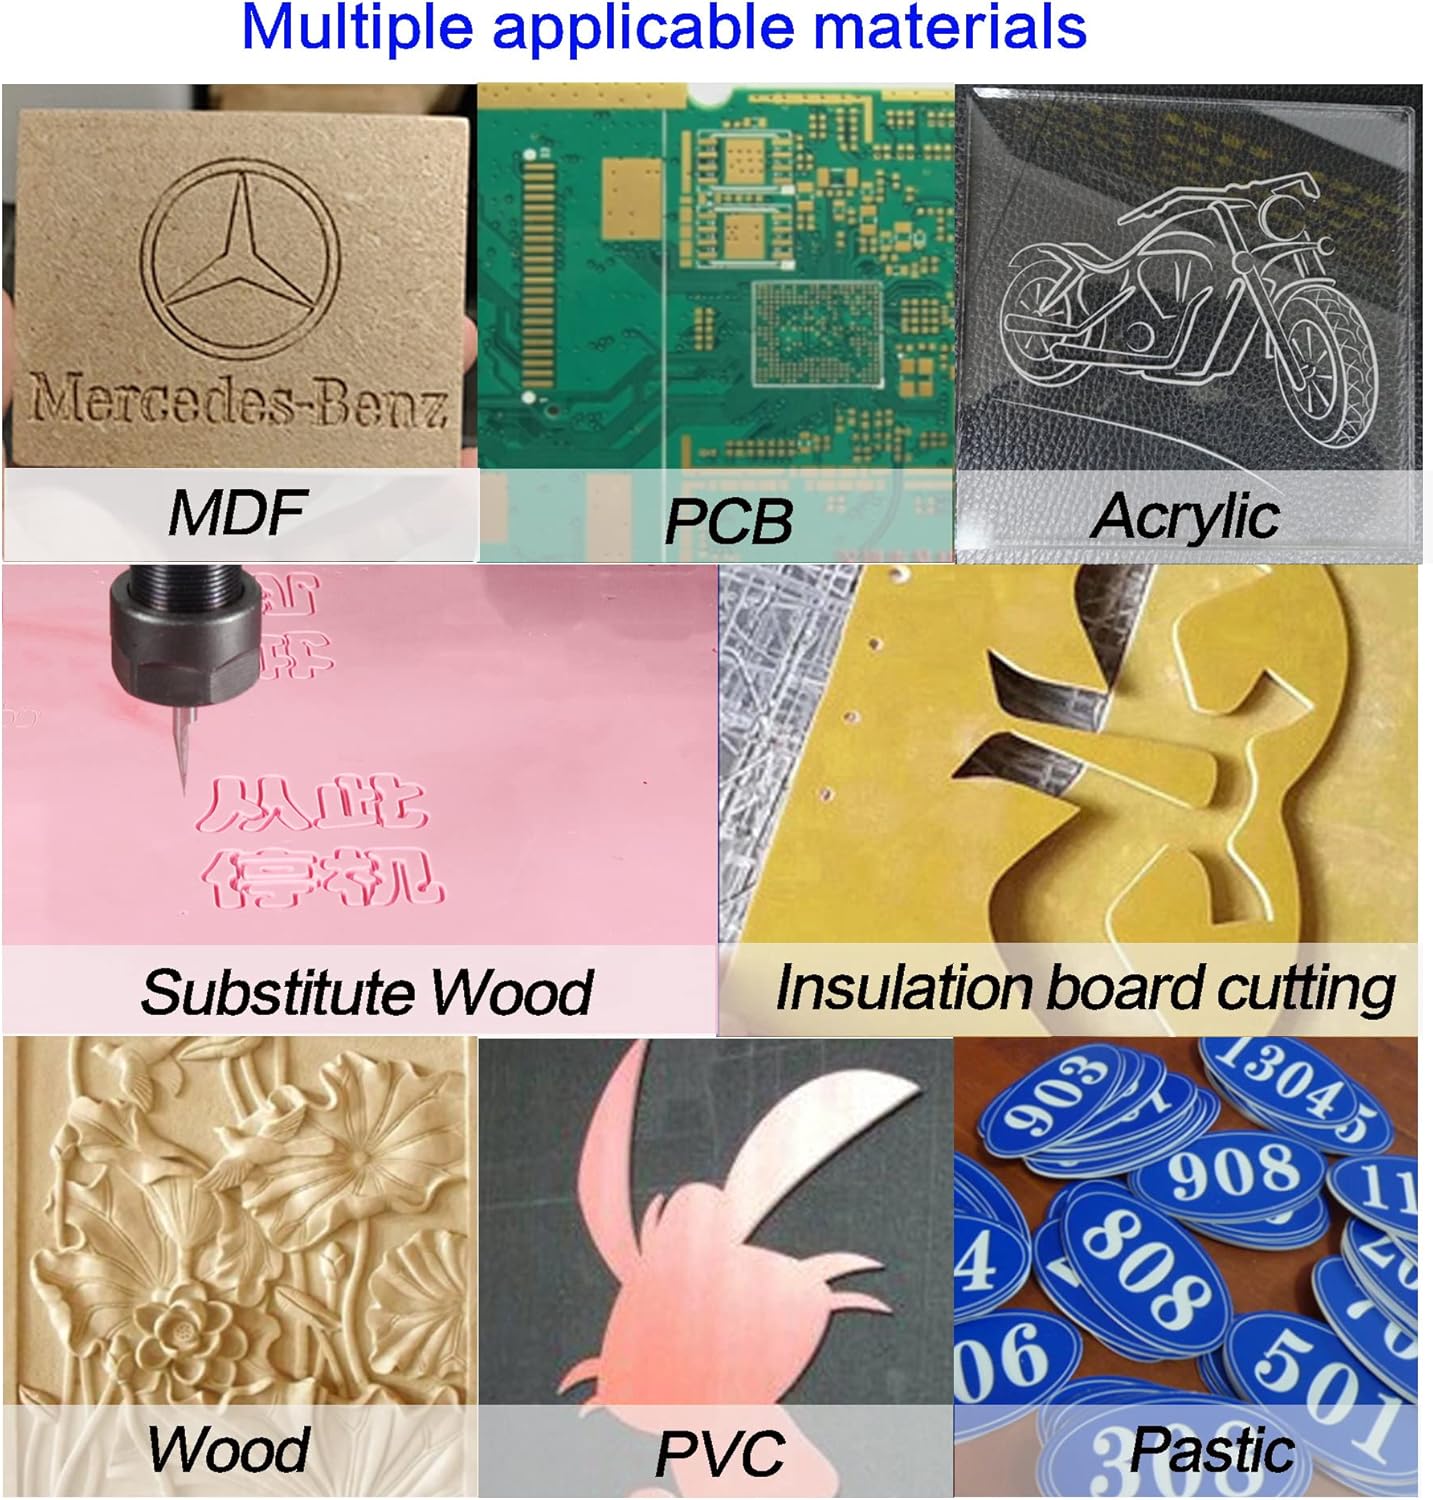
- Support for engraving materials: Wood, acrylic, pcb, pvb and soft metal.
- Software: Grblcontrol
- Format flies that support 3-Axis engraving: Support G-code files of nc, ncc, tap, txt.
- Format flies that support 2-Axis engraving: Support nc, ncc, tap, G-code, ngc, png, jpg, gif, svg

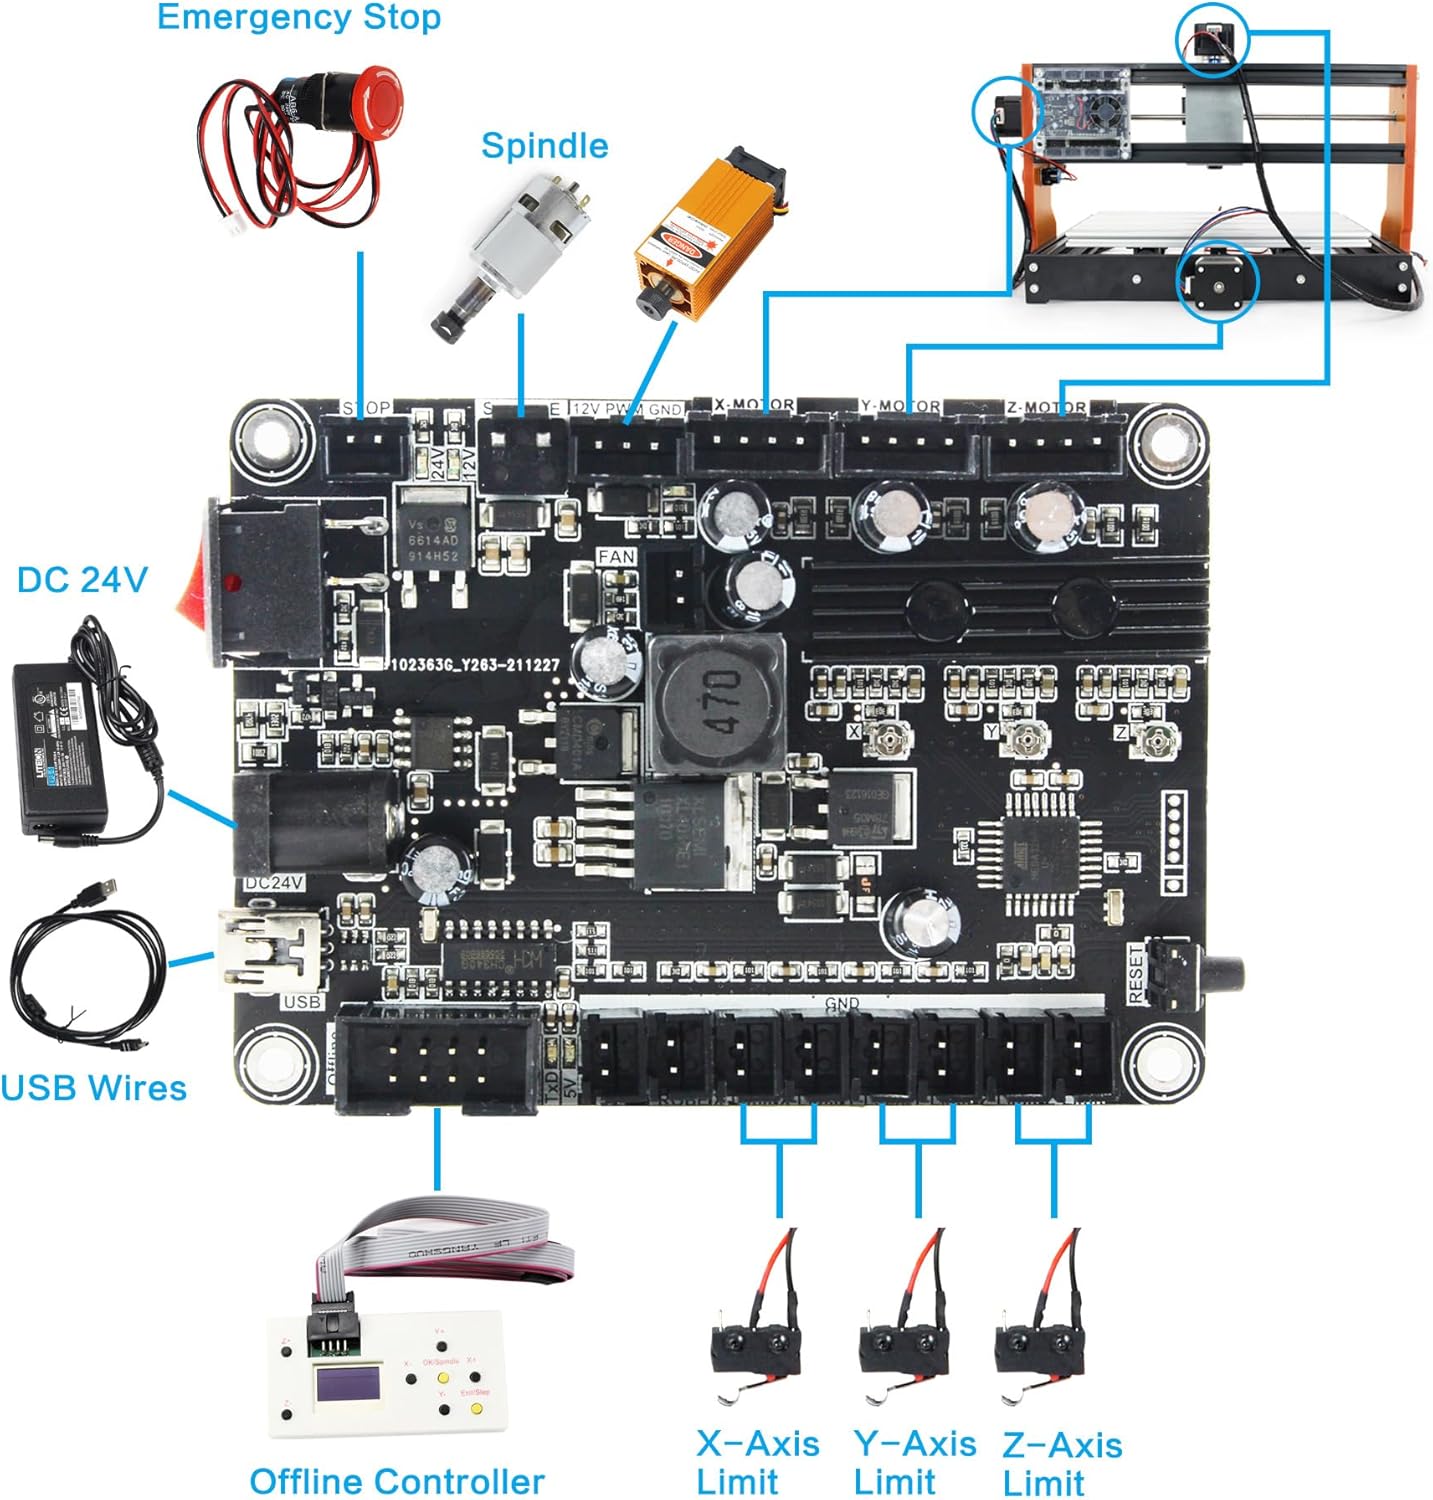
GRBL 1.1 Controller Board
- Connection: USB (USB-CH340)
- Input voltage: 12-24VDC (recommend 24VDC)
- Power Interface: 5.5-2.5mm DC interface
- Control software: GRBL control, Support system: Windows XP / Win 7 / Win 10 (32/64 )
- Support Stepper motor:12V, maximum current of 2A or less,is recommended within 1.5A and additional heat (any nema17 or nema23 stepper motor).
- Spindle PWM speed: Support

Parameters
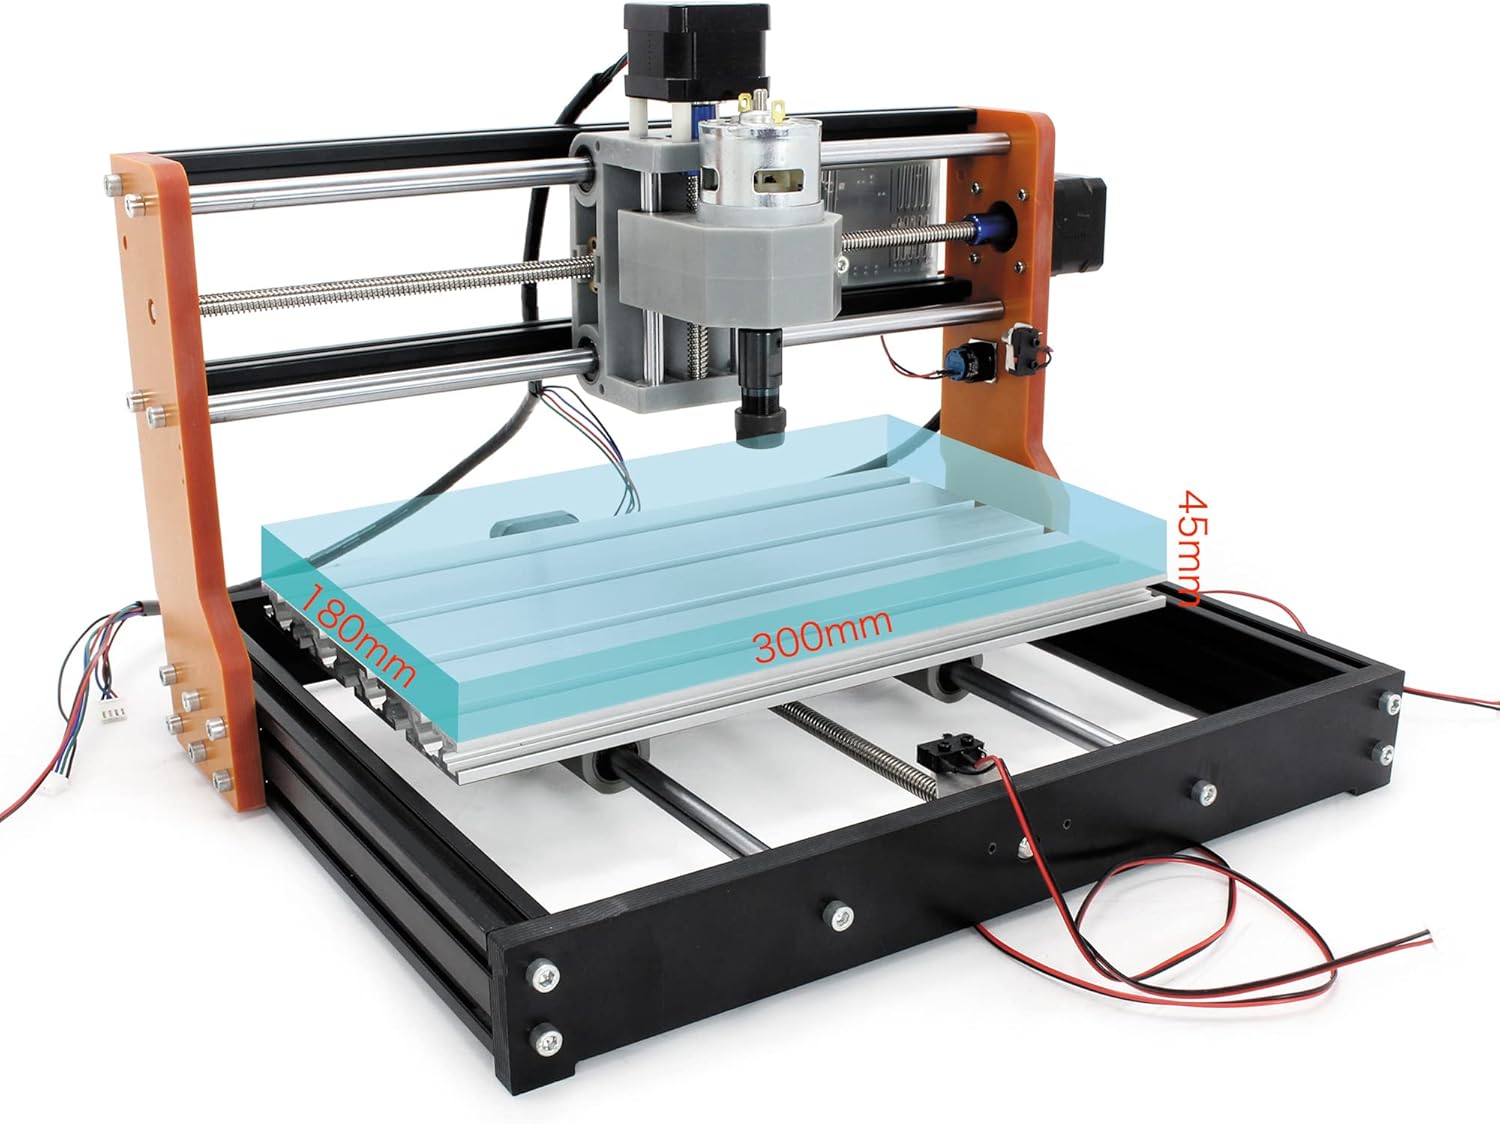
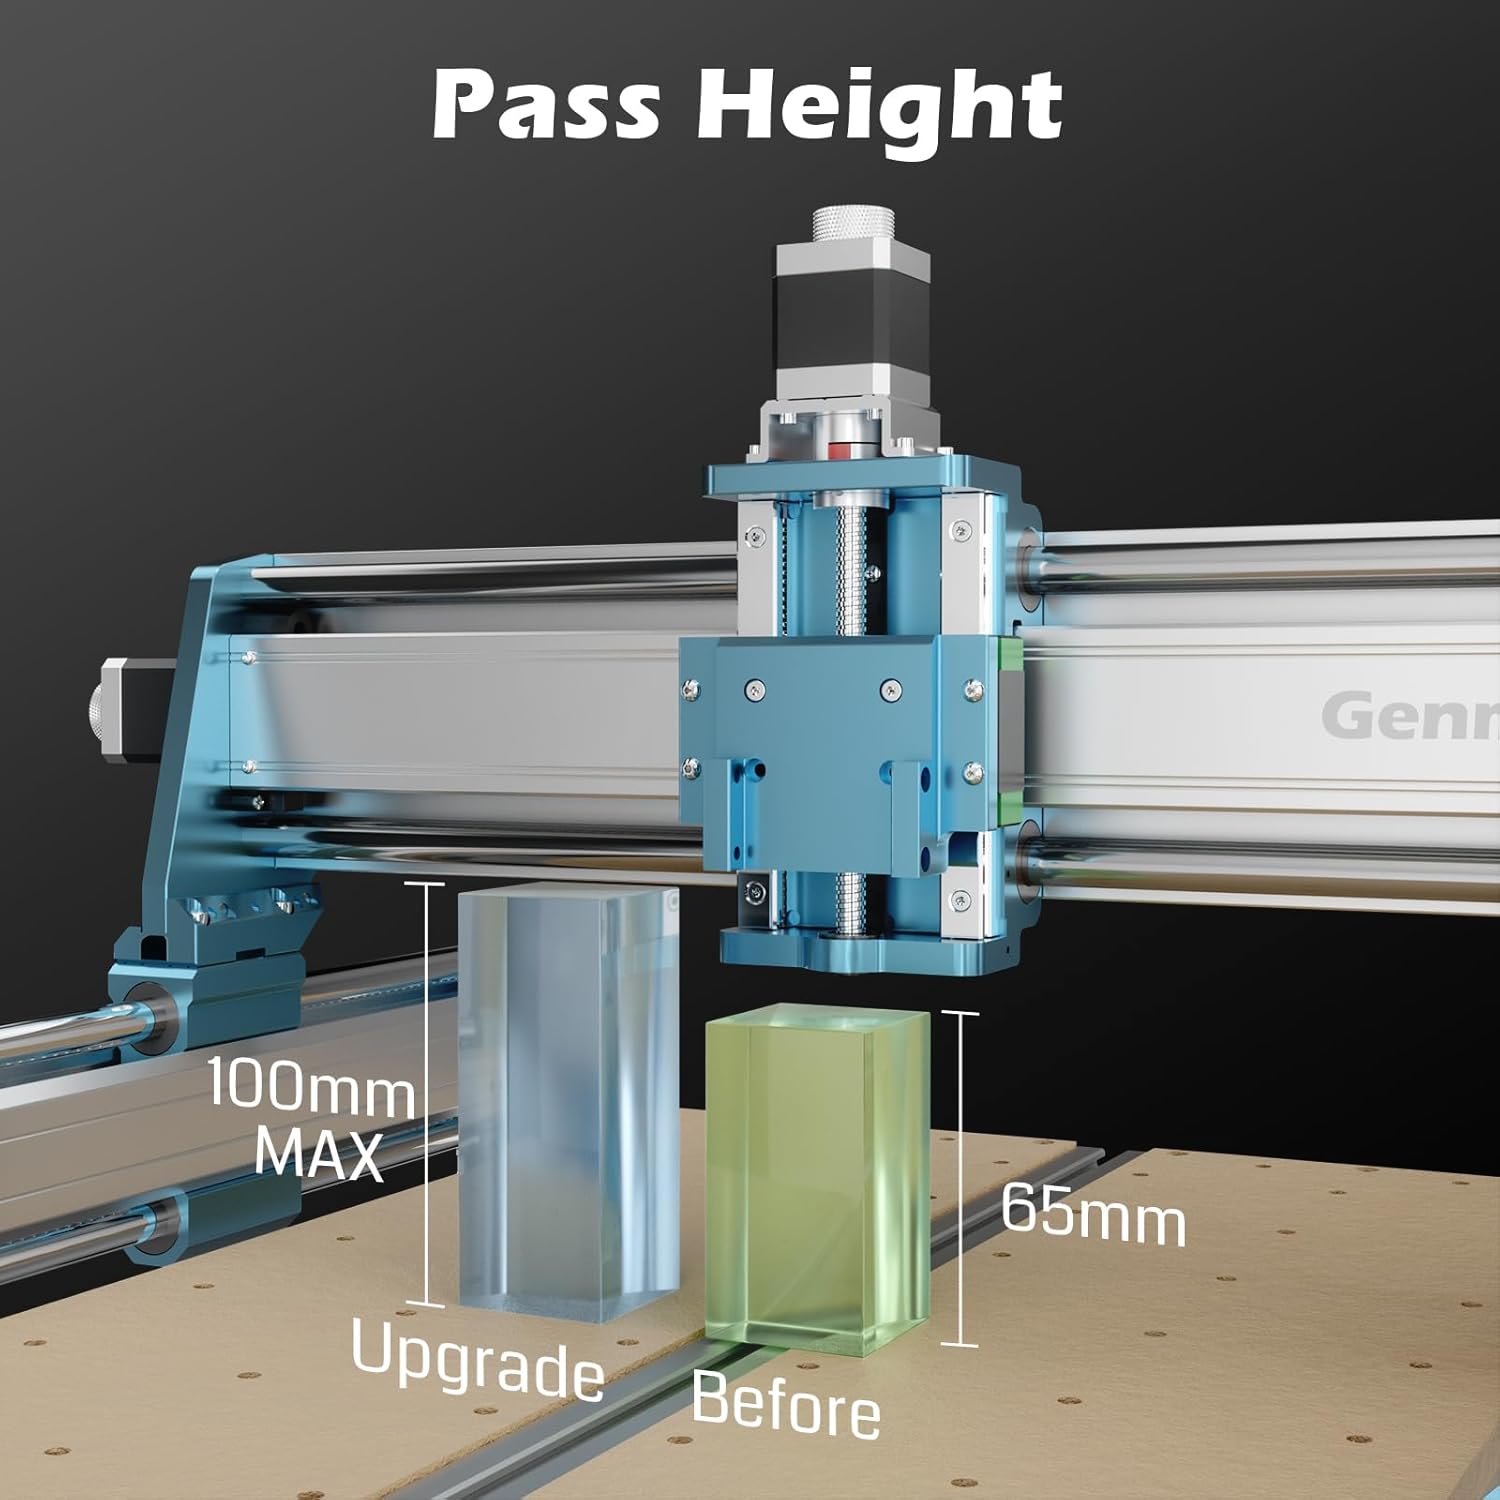
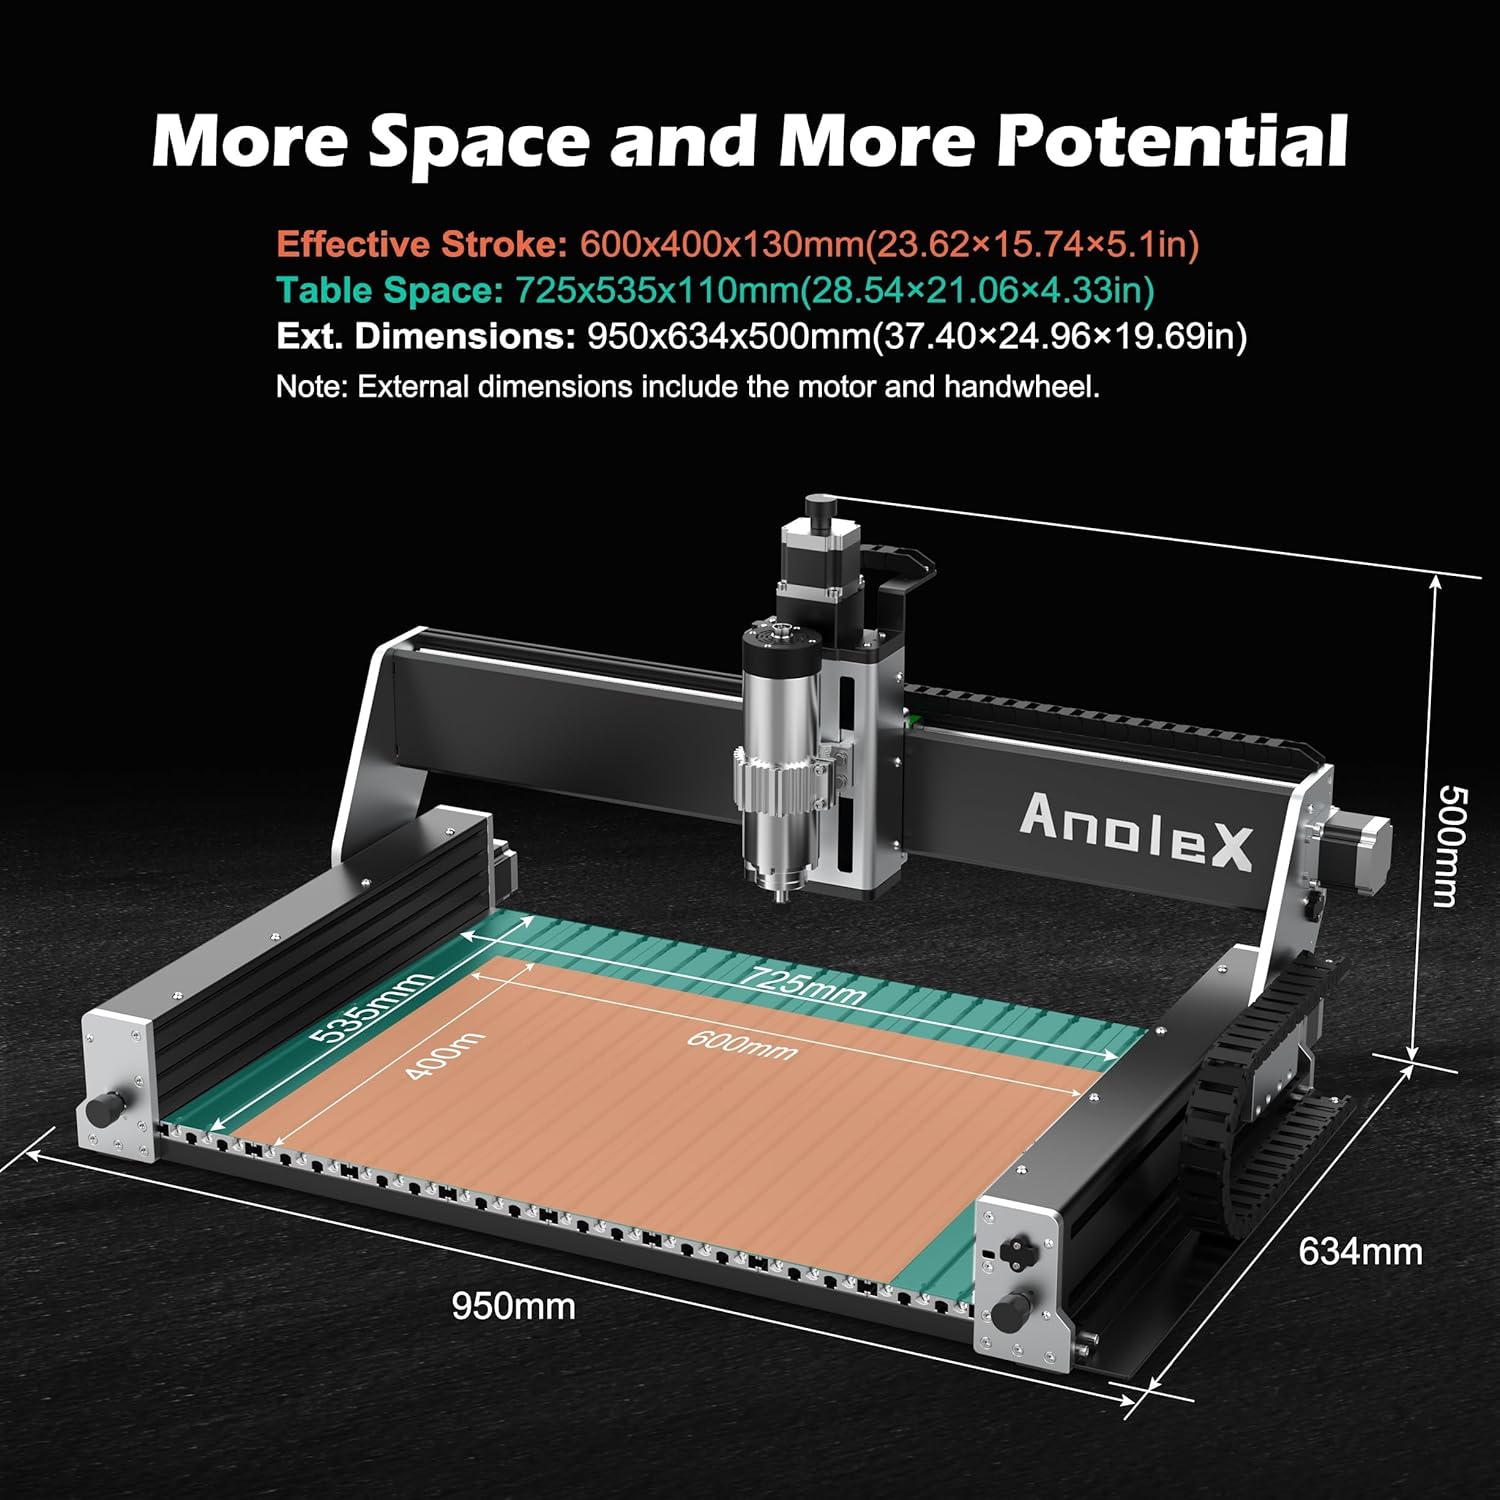
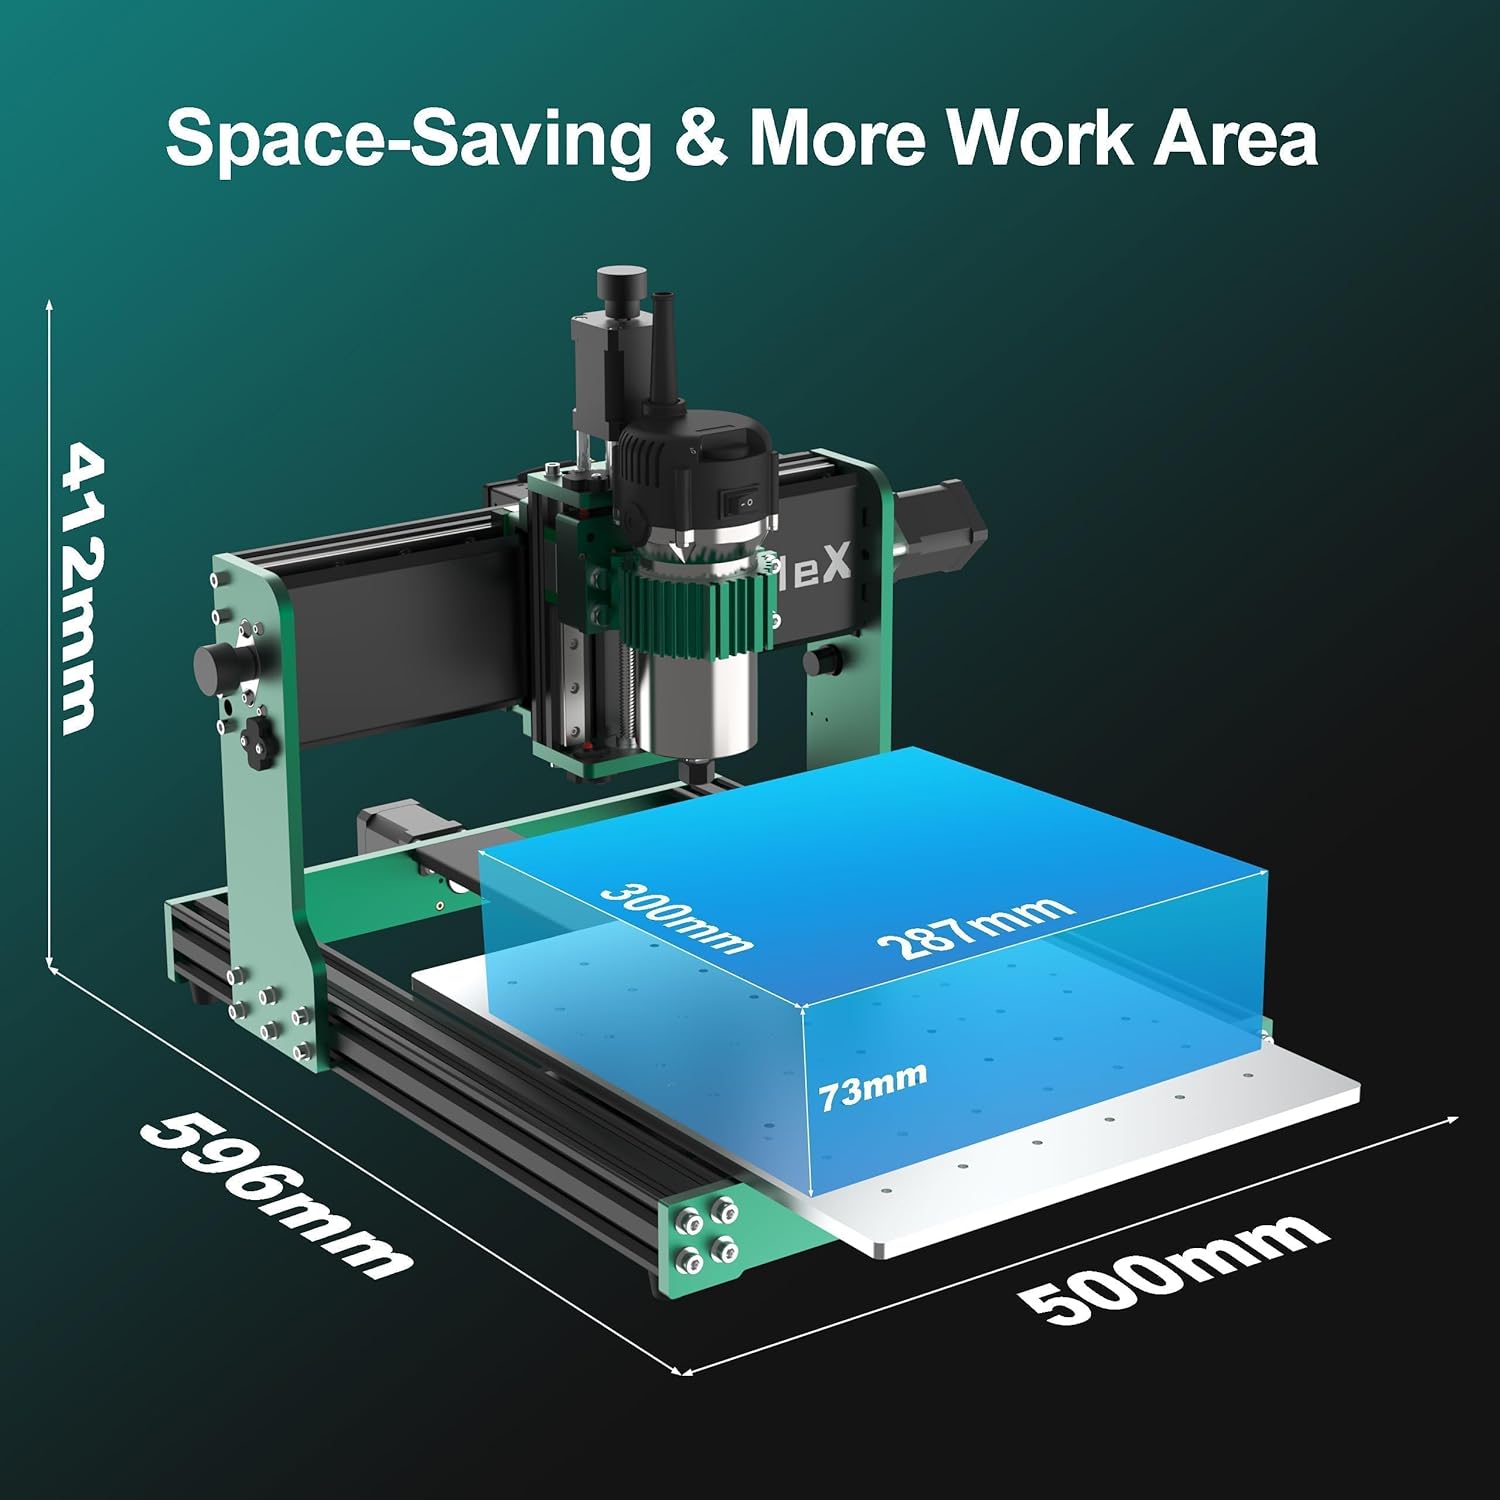
- Work area: 300x180x45 mm ((11.8 x 7.1 x 1.8”)
- Frame: 420x350x270mm (16.53×13.78×10.63”)
- Material: PA6 Nylon + Aluminum profile
- Step motor: Nema17 stepper motor 1.3A, 0.25N.m
- Processing accuracy: About 0.2mm

About Machine Installation:
- Although this mini engraving machine is shipped in bulk, it is simple and easy to install. The package is equipped with an English installation and operation manual. In addition, we also have an assembly video, so users do not have to worry about not installing the machine.
- In addition, it should be noted that this is only a mini machine suitable for novices or DIY enthusiasts, and cannot be compared with professional industrial machines.
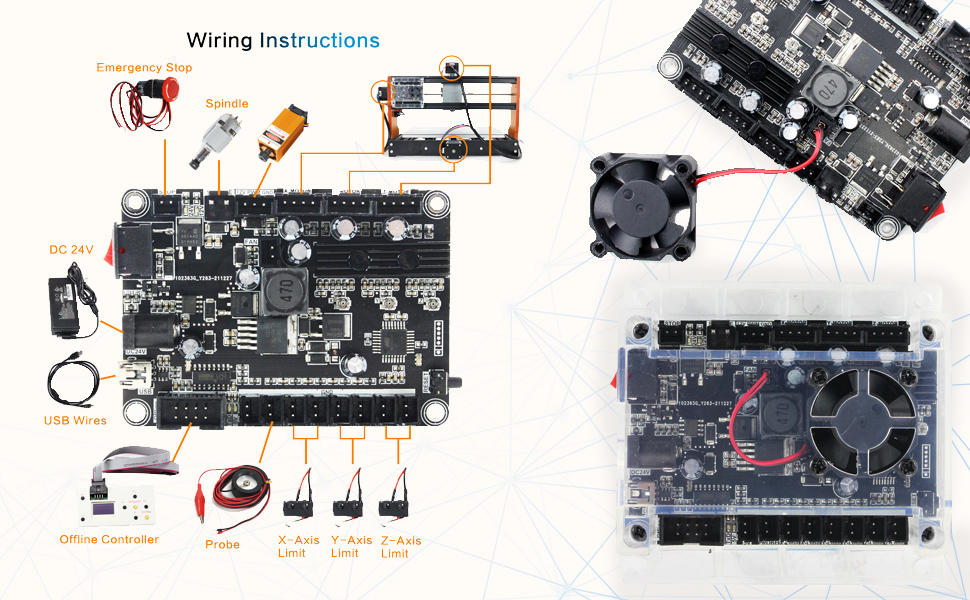
Update GRBL 1.1 Control Board Fuctions
- New fuction : Add emergency stop port and X/Y/X axis limit switch port
- Add the power switch button, simple operation, more safety in the process of using the machine.
- Enhanced spindle drive, can support up to 20,000 rpm spindle motor.
- Add the outer casing, not only protectt control board in transit, to avoiid short circuit problem during use.
- Cancel the drive module, use integrated imported stepper motor drive, with short circuit protecttion,and integrated heat dissipation aluminum alloy.
- Improved USB interface: The original USB interface is patch soldering, transport collision and improper use, easy to drop, now changed to plug-in, very strong.
- The spindle drive increases the optocoupler isolation, which makes the control board generate less heat.
- Add offline controller recognition,can insert offline modules and computers at the same time. Offline controller will automatically identify if there is computer control.
- Add the low noise fan port to force heat dissipation.

Be the first to review “RATTMMOTOR Upgrade 3018-PRO CNC Wood Router Machine Kit 3 Axis GRBL DIY Mini CNC Engraver Milling Machine+Emergency Stop and Limit Switch for Cutting Plastic Acrylic PVC PCB Wood”
Related products

Original price was: $4.197,00.$0,00Current price is: $0,00.
Original price was: $2.877,00.$0,00Current price is: $0,00.
Original price was: $5.397,00.$0,00Current price is: $0,00.

Original price was: $839,00.$0,00Current price is: $0,00.
Reviews
There are no reviews yet.